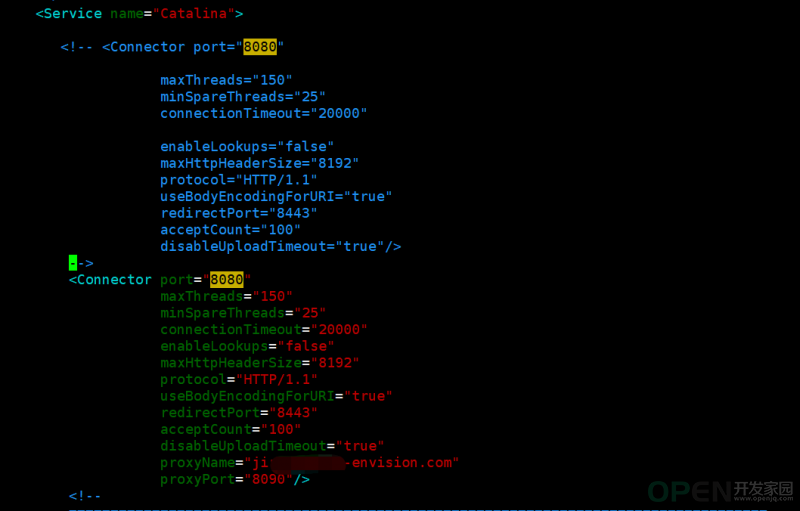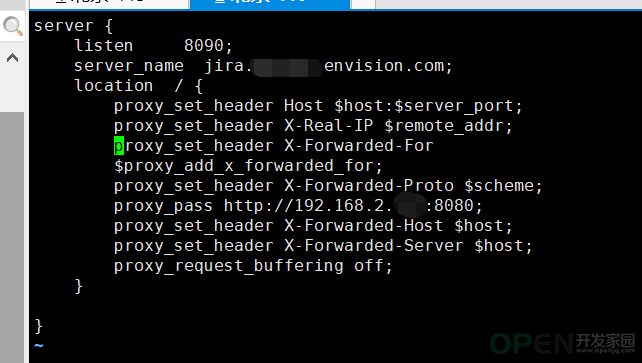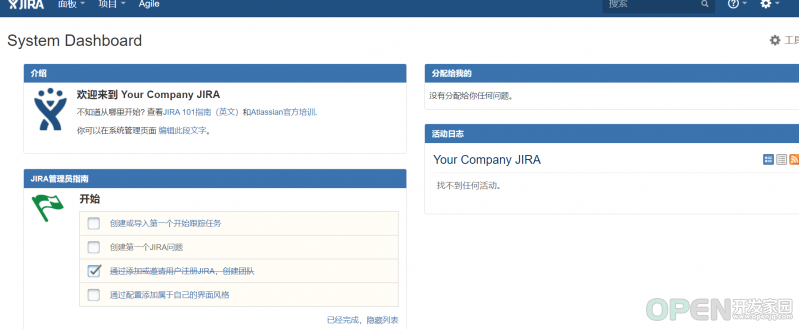
[Nginx] 关于nginx 实现jira反向代理的问题
![]() web服务器
发布于:2021-11-15 16:32
|
阅读数:633
|
评论:0
web服务器
发布于:2021-11-15 16:32
|
阅读数:633
|
评论:0
免责声明:
1. 本站所有资源来自网络搜集或用户上传,仅作为参考不担保其准确性! 2. 本站内容仅供学习和交流使用,版权归原作者所有!© 查看更多 3. 如有内容侵害到您,请联系我们尽快删除,邮箱:kf@codeae.com | ||
相关帖子
-
固态硬盘选tlc还是mlc怎么看
Shun 阅读 424 0 赞
-
腾达路由器默认密码是多少
小蚂蚁 阅读 495 0 赞
-
1650显卡性能如何
小蚂蚁 阅读 937 0 赞
-
javascript怎么实现窗口置顶
CodeAE 阅读 357 0 赞
-
JavaScript怎样实现点击出现图片效果
CodeAE 阅读 257 0 赞
-
nginx启ssi方法,宝塔面板nginx开启ssi
CodeAE 阅读 319 2 赞
-
如何加强网站安全防范
CodeAE 阅读 293 1 赞
-
解决编辑器图片插入多次但发布后只显示一次问题
CodeAE 阅读 321 2 赞
-
使用原生querySelectorAll和forEach来实现点击切换
CodeAE 阅读 262 0 赞
-
免插件、DZ内置JS轻松实现外链访问二次确认对话提示框
CodeAE 阅读 264 0 赞
发布文档 3387
热门推荐
-
关于GBK与UTF-8互转乱码问题解读
CodeAE 2025-03-09
-
EasyBCD系统引导修复工具 V2.4.0 中文版
CodeAE 2024-12-14
-
图吧工具箱2024.9绿色版
CodeAE 2024-12-12
-
Win10右键管理提示“该文件没有与之关联的程序来执行此操作”怎么办
CodeAE 2024-12-08
-
如何白嫖一张永不过期的SSL证书
CodeAE 2024-11-17
-
自己动手写一个挪车通知工具
CodeAE 2024-11-10
-
如何利用html+js写一个大小写字母互转工具
CodeAE 2024-10-20
-
Discuz教程-帖子里有多个MP4媒体,默认只播放一个
CodeAE 2024-10-13
-
Discuz教程-禁止复制及使用f12开发者模式
CodeAE 2024-10-13
-
C/C++实现植物大战僵尸
CodeAE 2024-10-05
-
B站视频下载工具 Bilidown 1.2.0
CodeAE 2024-10-03
-
2024显卡天梯图一览表
CodeAE 2024-09-01
-
win10怎么查看电脑配置显卡 电脑查看显卡配置方法
CodeAE 2024-08-25
-
Word文档中的doc和docx格式有什么区别?
CodeAE 2024-07-21
-
禁止win10更新的方法
CodeAE 2024-06-02
-
查看Window激活状态的方法
CodeAE 2024-05-26
-
利用宝塔面板实现夸克网盘自动签到获取永久容量
CodeAE 2024-05-01
-
阿里云服务器CentOS系统注释磁盘命令
CodeAE 2024-03-17


 QQ好友和群
 QQ空间
QQ空间